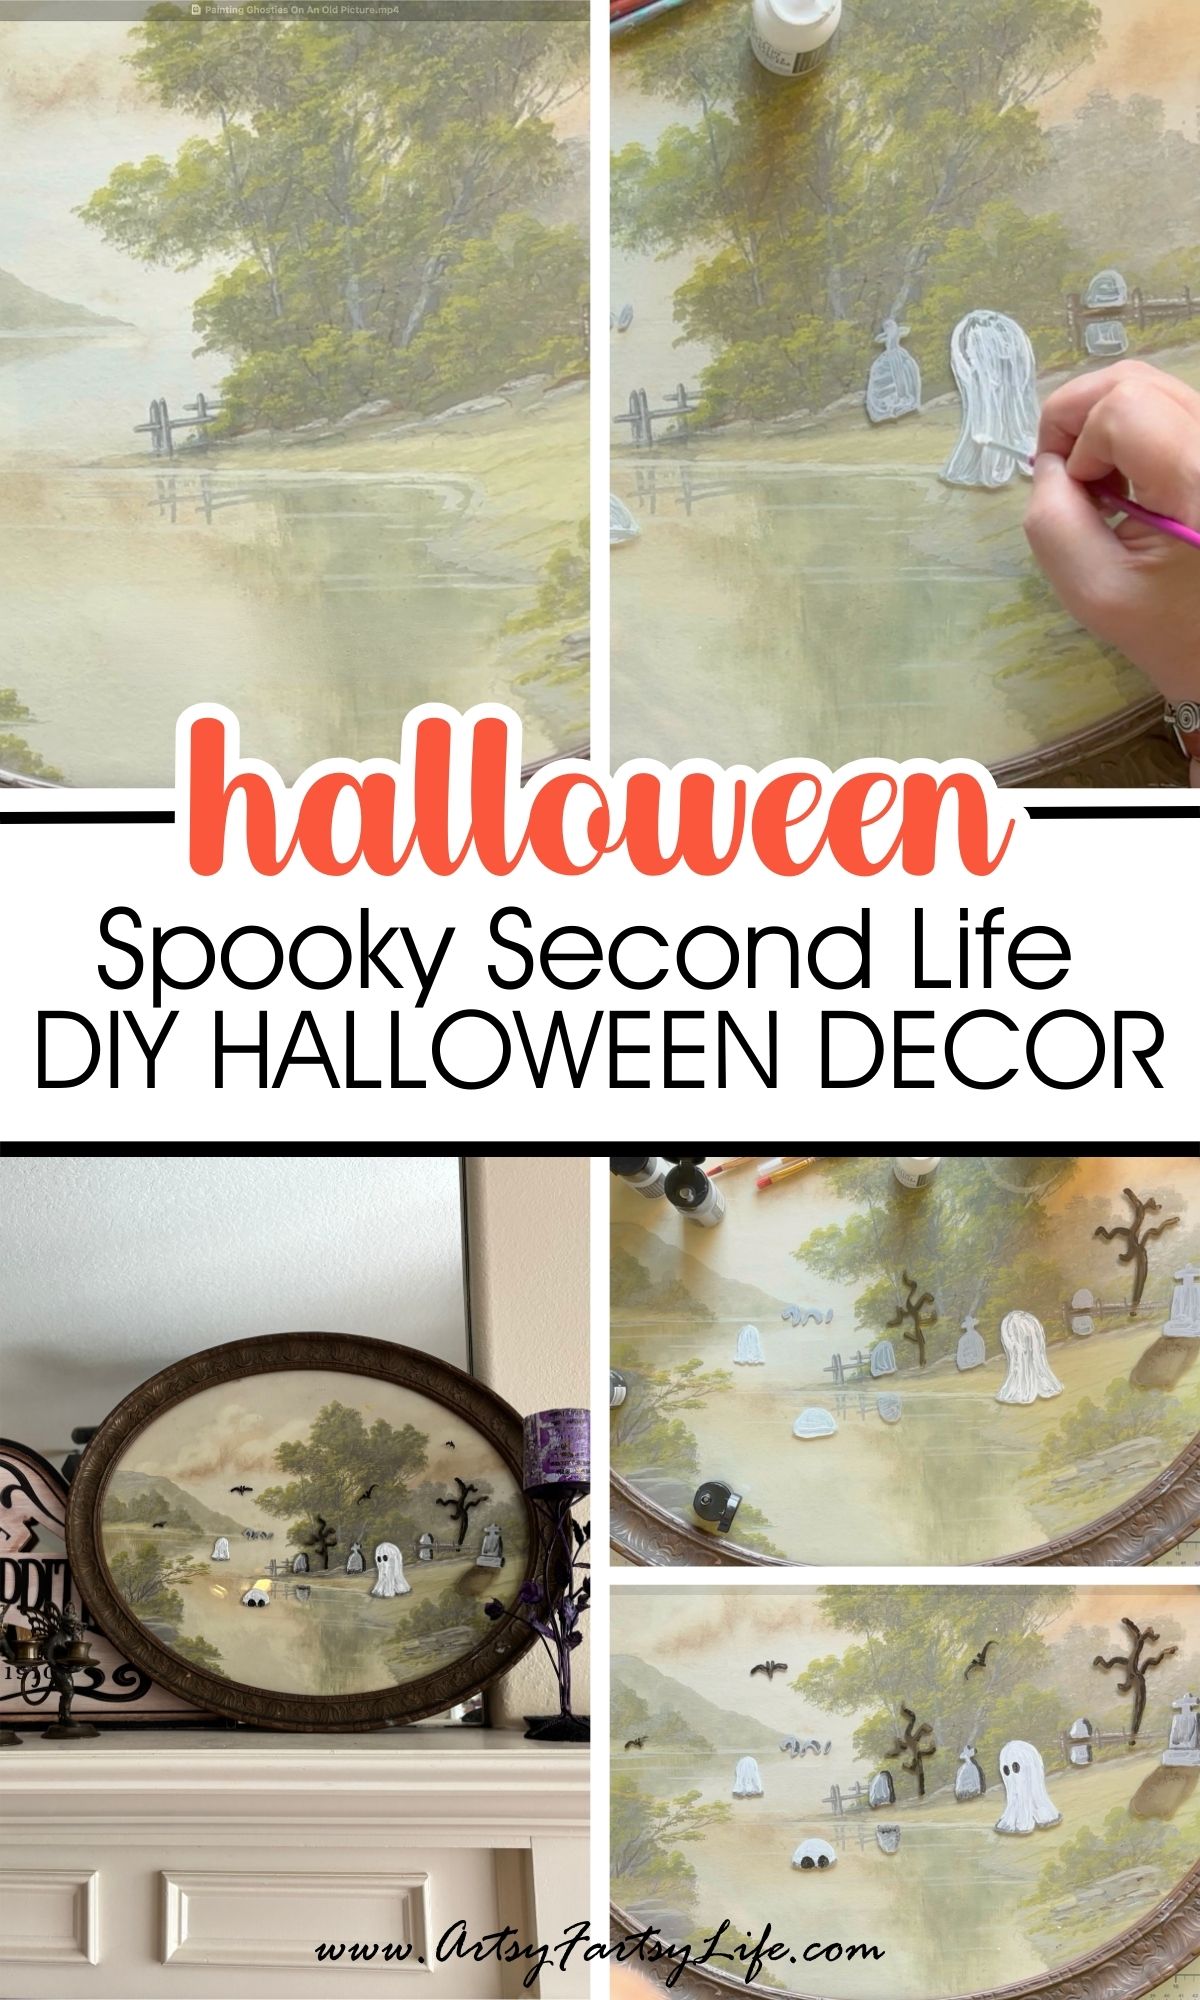
Okay, hear me out: you know that dusty old picture frame you've been ignoring because it's cracked, chipped, and giving off haunted attic vibes? WELL, HOLD ONTO YOUR BROOMSTICKS, because it’s about to become the crown jewel of your Halloween mantle!
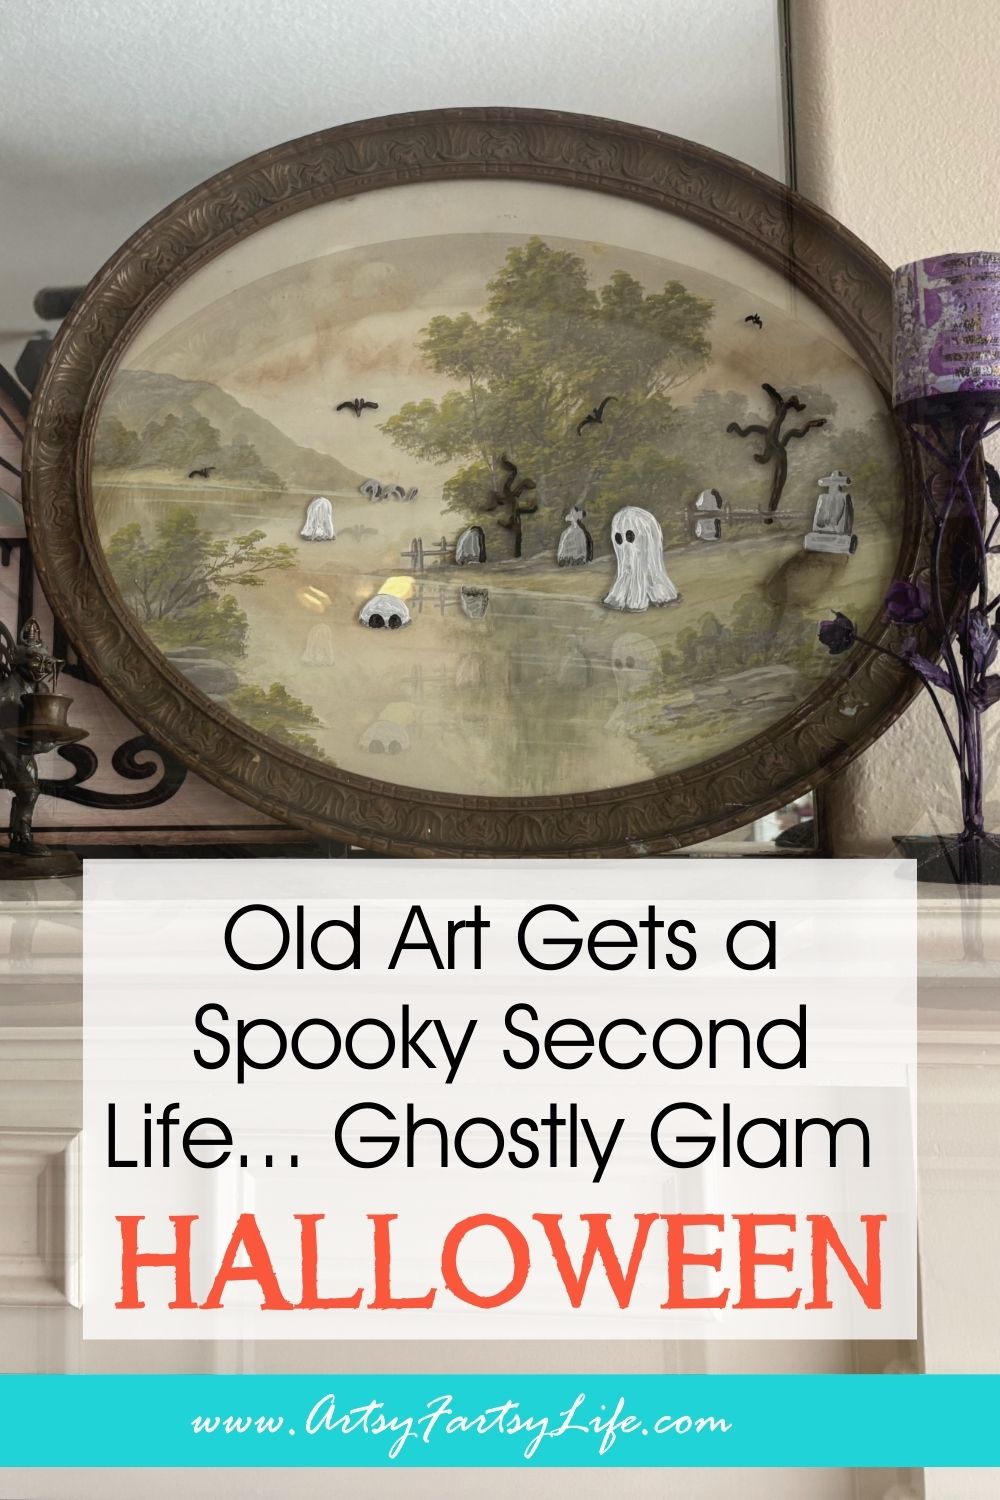
This little spooky transformation started with a forgotten thrift-store find that had seen better centuries. I snagged it at an auction years ago, mostly because it looked like something a vampire might stare into dramatically. The art inside? Meh. The frame? Falling apart. The vibe? IMMACULATE for a ghosties picture!
But here’s the twist: instead of painting over the artwork, I decided to paint ON THE GLASS. Yep. Right over the top. Why? Because 1) it’s fun, 2) it feels a little rebellious, and 3) if I mess it up, I can just scrape it off.
Welcome to the joy of painting on glass, where mistakes are not just fixable - they’re practically encouraged.
Supplies You'll Want Nearby (aka excuses to bust out your stash):
- A crusty old landscape picture in a frame (the more cracked, the better!)
- Acrylic paint in white, black, gray, and spooky shades of your choosing
- Glazing medium (makes your paint beautifully translucent and ghost-like)
- A million paintbrushes you forgot you had
- Paper towels, a steady hand, and... patience, my dear
Painting Halloween Art Video Walkthrough
Step 1: Embrace the Ghosties
We’re starting with some good ol’ fashioned ghost painting - think Casper, not Scream. These little floaty friends are the stars of the show, and painting them on glass is way easier than it sounds. I used white paint mixed with glazing medium to give them a semi-transparent, ethereal glow.

Pro Tip: If your paint is acting like a diva and lifting right back off the glass, it’s probably still wet. Give it a minute. Or five. Especially if you live somewhere like Florida where humidity is... basically soup.
Step 2: Build Your Spooky Scene
Next up: graveyard realness. We’re talking crooked headstones, little crosses, and one that’s just casually submerged behind a dirt line (because even ghosts have yard drama). Add in a creepy tree or two - use a color like “Scorched Timber” because yes, that exists and yes, it’s PERFECT.
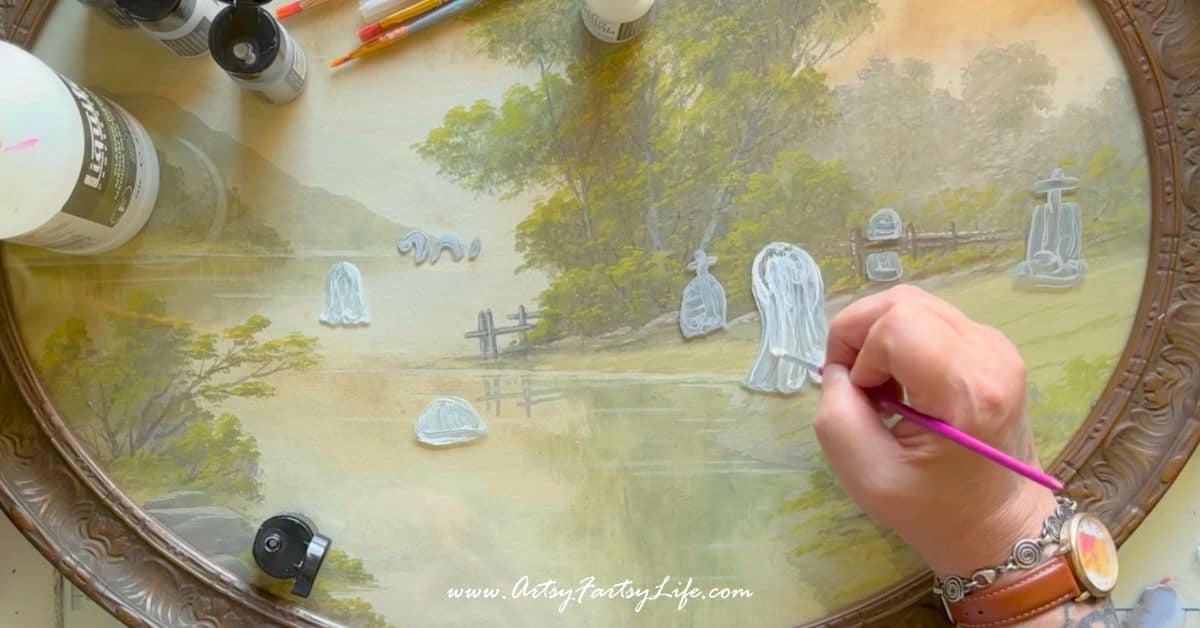
This part is where you let your spooky soul shine. I even painted a tiny ghost swimming across the river, because why not? He’s clearly living his best afterlife!
Step 3: Add the Drama (aka the Details)
Here’s where the dimension kicks in. A touch of shadow on the gravestones, a wisp of highlight on your ghosties, a knot hole in the tree that looks suspiciously like an eye staring at you. It’s the little things that take your haunted art from “awww” to “AHH!”

And let’s not forget the bats. Tiny, fluttery, slightly wonky bats because (true story) I twitched mid-paint and gave one a broken wing. But honestly? It made him cuter. Flaws = character, especially in Halloween crafts!
Step 4: Let It Dry (Eventually)
I know. I KNOW. The waiting is torture. But remember, this is glass - it’s not like painting on canvas. And if you live somewhere humid like me, drying time is a suggestion, not a promise. Try not to put your arm in wet paint. (Try.)
Final Reveal: Ghostly Glam on the Mantle!
Once it’s all dry, pop that haunted masterpiece on your mantle and prepare to swoon. I wasn’t ready to fully Halloween-ify my living room just yet (hello, it's July), but this little piece is LIFE. It’s whimsical. It’s weird. It’s perfect!

The Takeaway?
You don’t need perfect supplies, perfect weather, or even perfect skills. You just need a busted old frame, a love for Halloween, and a ghost in your heart (or three on your glass). So grab your brushes, cue up some creepy tunes, and get your haunted glam on.