I wanted to make some cool ephemera for my junk journal, without having to buy a whole bunch of new products to make them! Here are my best tips and ideas for making shiny DIY tags and embellishments from craft supplies you already have laying around!

Here Are The Tags!
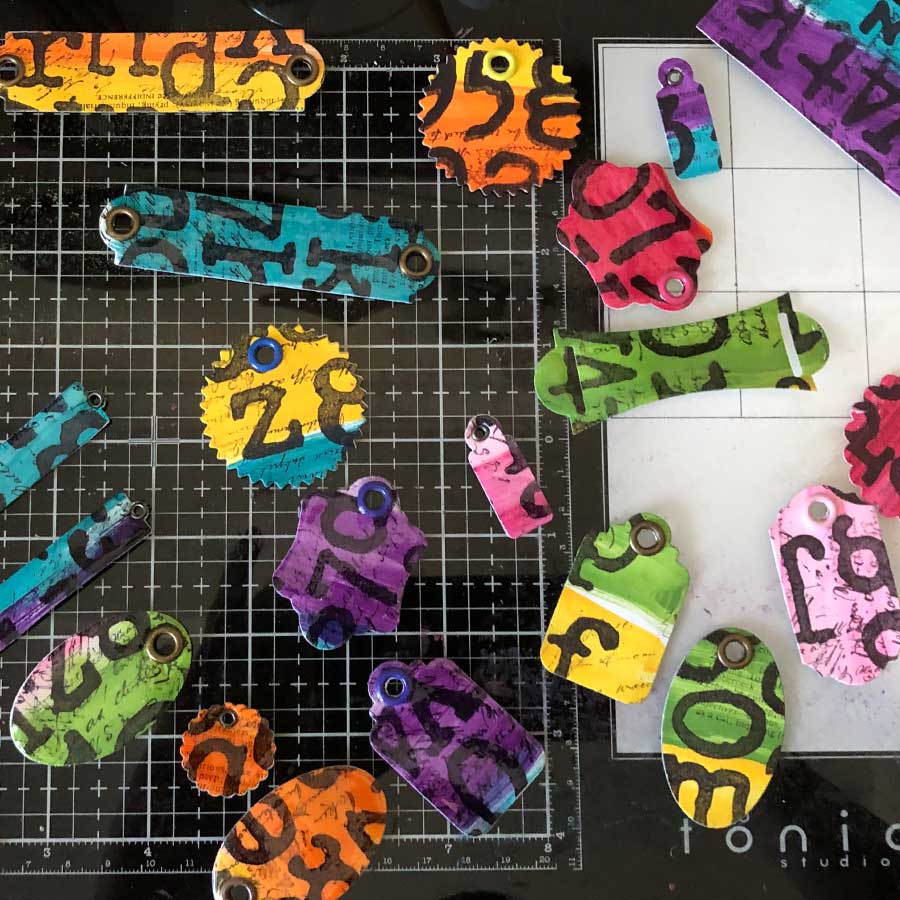
The neat thing is that you can make these in any style or color, including shabby chic, vintage, modern, colorful or black and white!
How To Make Shiny DIY Tag Embellishments Video
Step 1: Paint the Base
Let’s start by laying down some color. Grab whatever acrylic paints you have—whether they’re from Blick or Michaels—and pick a few complementary colors (colors opposite each other on the color wheel) to really make things pop.
Use mixed media paper if you have it, but honestly, anything thicker than printer paper will work.
To make your paints more translucent and easier to spread, mix them with clear gesso, matte medium, or even Mod Podge. Brush them on in rough stripes—don’t aim for perfection. Imperfections = character!
💡 Hot Tip: Want softer tones? Add a bit of white paint to tone things down. Want more texture? Use a dry brush or a palette knife.
Step 2: Stamp It Up
Once your paint is completely dry (I know, waiting is hard), it’s time to add some texture with stamps. Any stamps will do—letters, numbers, words—whatever you have.
Use archival ink so it doesn’t smudge later. Randomly stamp across your painted background. Don’t worry about straight lines or perfect placement. A little chaos adds charm!

Step 3: Cut Out the Tags
You’ve got a beautifully painted and stamped sheet—now let’s turn it into tags!
- If you have a die-cutting machine, great! Use it to cut classic tag shapes.
- No machine? No problem. Use scissors or a hole punch to cut circles or rectangles.
- Want a polished look? Cut two of each shape so you can glue a front and back together.
Step 4: Glue Fronts and Backs
Use art glitter glue, collage medium, or even a glue stick to sandwich your tags together. This gives them structure and a nice finished look on both sides.
Don’t worry if your edges don’t line up perfectly—we call that "shabby chic."
Step 5: Add Grommets (Optional but Extra Cool)
If you have a Crop-a-Dile or any hole punch, add a hole at the top of your tag.
Then grab some grommets or eyelets and pop those suckers in! It makes the tags look polished and gives you a place to add ribbon, twine, or even safety pins later.
Step 6: Time to Shine
Now for the fun part—glossy accents!
Apply Glossy Accents or any clear dimensional medium over your tag. It dries like glass and gives your tags a gorgeous, durable finish. Cover the whole surface or just accent certain parts.
✨ Pro Tip: Let it dry overnight for a solid, hard finish that won't stick to your journal pages.
Final Thoughts
You just made the cutest shiny tags ever—from stuff you had laying around! These are perfect for junk journals, planners, gift tags, or just collecting in a box because they’re that pretty.
Crafting doesn’t have to be expensive. It just has to be fun.
So tell me—are you Team Die-Cut or Team Scissors & Scraps?