I have had SO MANY questions about how to do magazine collage, I thought I would do an entire process video to show you how I do my modern steampunk art. Hopefully this will help spark some creativity in your artwork too!
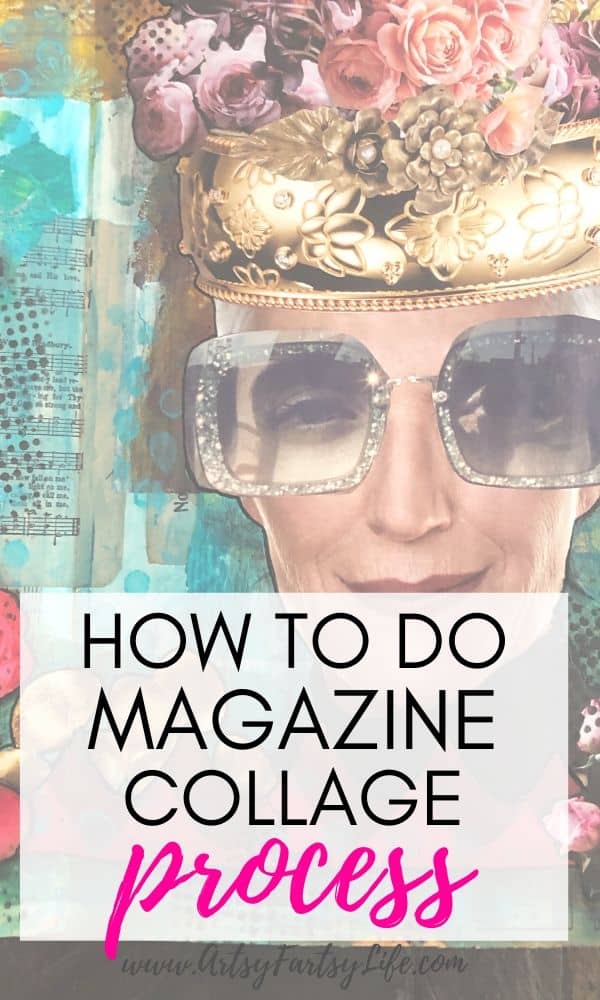
Magazine Collage Process Video
I love seeing how a piece of artwork comes together and this time I recorded the whole process, soup to nuts!
Step #1 - Picking Magazine Images
When I am thinking about making a piece of art, I find a focal point to start! I thumb through my (extensive) collection of old and new magazines and pick SOMETHING to start with.
For this project I found a pair of sunglasses and then decided to find a lady that would match them! I ripped out about 6 pictures of ladies and started collecting a whole bunch of other pictures I might use.
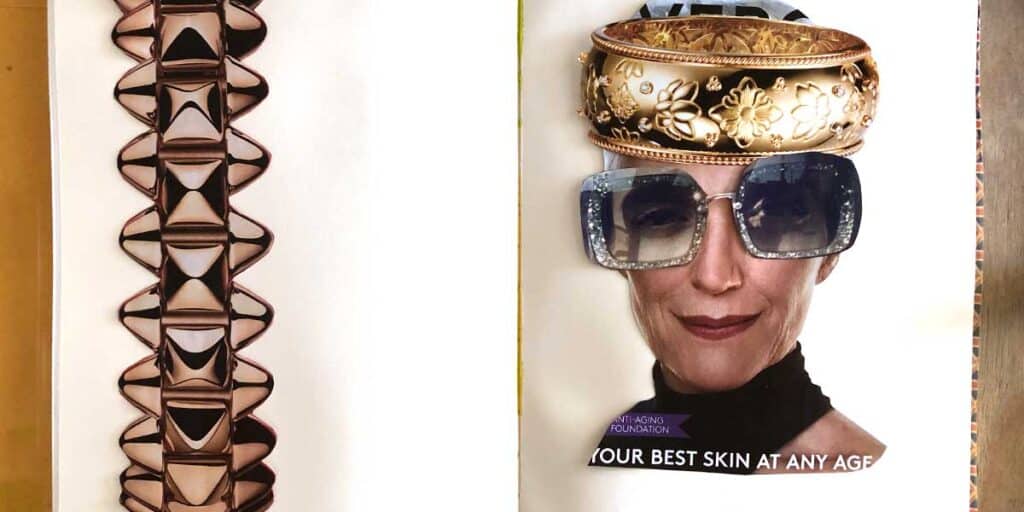
I found the THE BEST ad with a senior woman in it! I love the fact that this piece features a middle aged woman #represent!
Here are some of the magazines I used for this collage...
- All Recipes
- Vogue
- Martha Stewart Living
- Birds and Blooms
- Southern Living
- Elle
I love using the Dyan Reaveley Journal because it has great paper and is super sturdy!
Step #2 - Laying Out The Pictures
The next step is to take all your pictures and try to figure out some fun design that you want to use!
I picked the lady, sunglasses, the long metal piece and the two giant rings to be focal points for my piece.
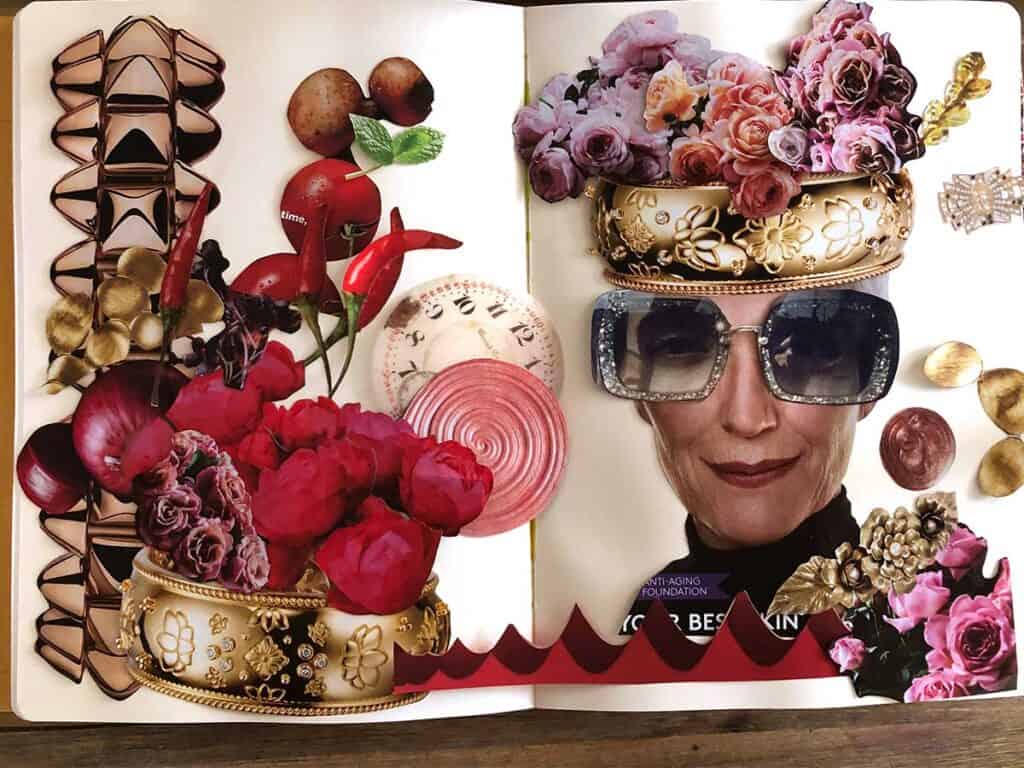
The main parts of this collage are red, pink and gold... something to think about as we move onto...
Adding Background Papers
There are a few types of backgrounds, lots of white space, totally covered with background papers and a mix of both.
I like to have some background papers so that there is texture and contrast behind whatever I am making.

I use Mod Podge to stick on vintage papers and my own Gel Plate backgrounds on tissue paper to create an interesting background.
Because the collage pieces that I was using were pink, red and gold, I wanted a contrasting color behind them so I picked brown and blue for my background tissues.
Step #3 - Paint On The Background
I like to use Dina Wakley Glazing Medium mixed with acrylic paint to make a translucent color wash over parts of the background that would have been plain white.
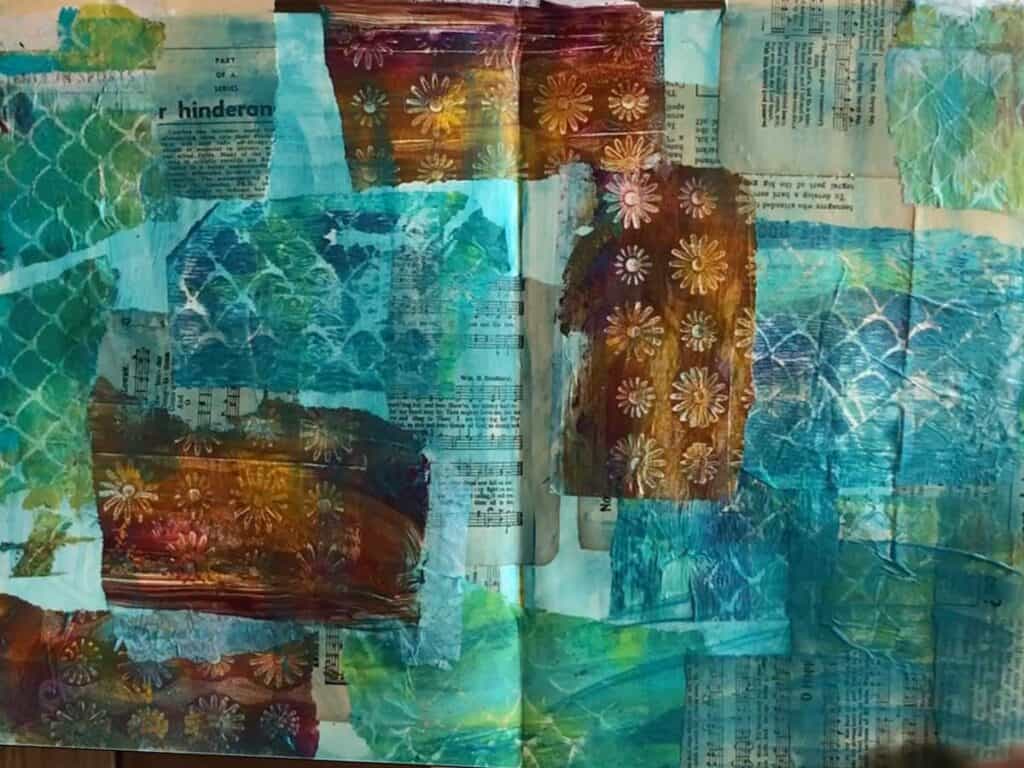
This is NOT a super specific layer, just splash some color on there and call it a day!
I picked blue and brown because they are part of the Modern Steampunk Colors that I use in my artwork!
Step #4 - Gluing It Down
Eventually you have to commit to something, so once you have your background done, it is time to glue down the focal points of your project.
Pro tip... you can leave parts of it "unglued" so that you can layer a little bit later! In the video I show picking up pieces to paint under them, this is because I have glued down parts of the pictures!
I use Art Glitter Glue with a fine tip for magazine pages. I rarely get wrinkles and this kind of glue sticks them down REALLY well!
Step #5 - Making Background Texture
Once you know where your main focal points are going, I like to use a stencil, blending brush and acrylic paint to put some "texture" around the focal points.
For this one I used a smaller circle stencil for the middle and a larger circle stencil for the edges.
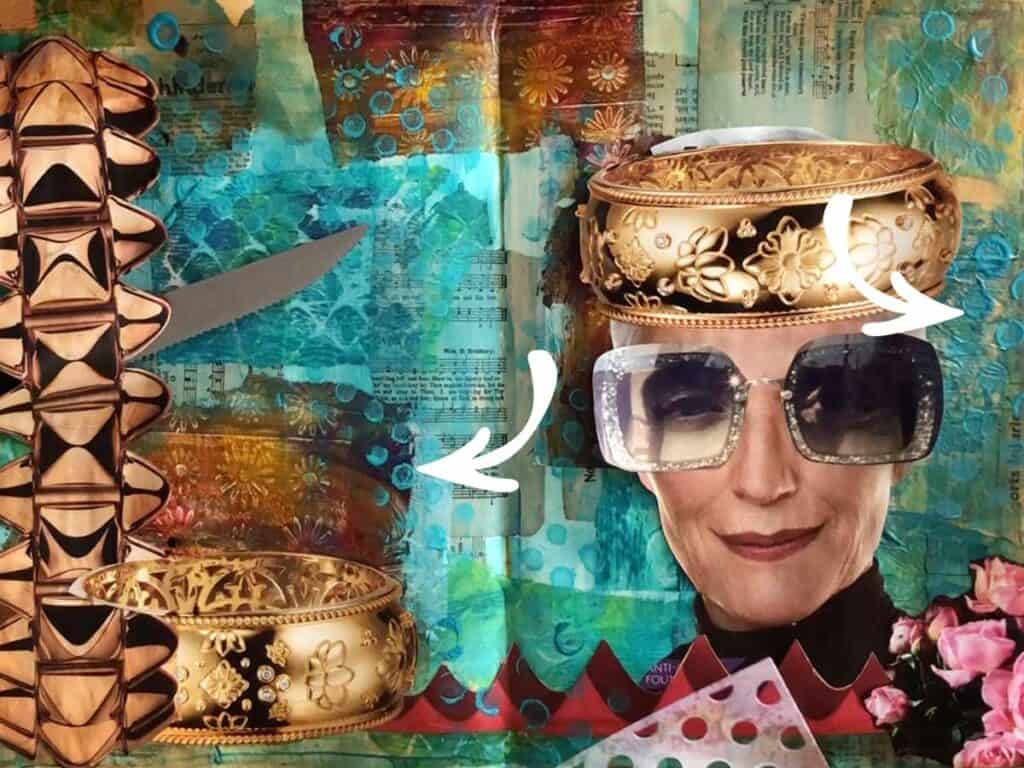
I also used lighter color paint in the middle and darker colored paint around the edges so that the lady focal point could continue to be the star!
Step #6 - Glue Everything Else Down
This one takes a LONG time to finagle around (it took me about an hour to figure out where I wanted everything!)
If you put something in the wrong place or glue it off center, don't worry! You are the only one who will notice...:) Just keep glueing!
Step #7 - Outline The Entire Project
The next thing to do is outline the entire focal point! I use a Posco paint marker to outline it. I KNOW, it looks super harsh, but in the next step it will seem better!
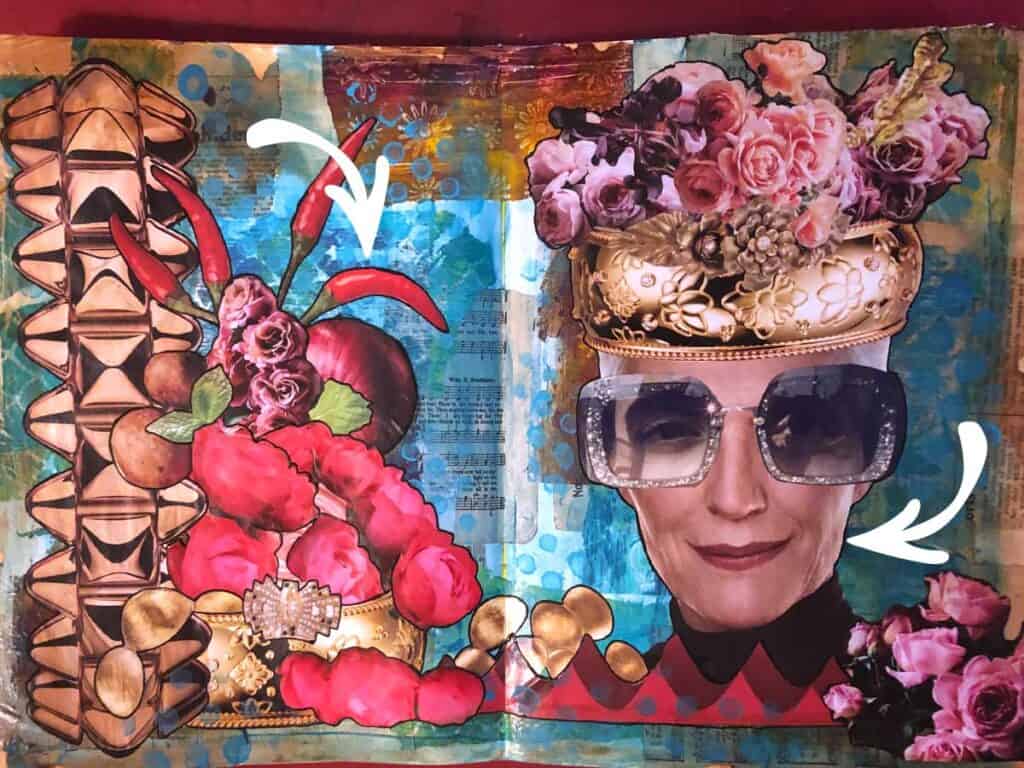
For the flower side I outlined a lot, including inside the flowers. For the lady I simply outlined everything (with no internal outlines).
Outlining ALL of your focal point tricks the eye into thinking it is all part of one whole thing instead of being a face, sunglasses and giant ring.
Step #8 - Shading Around The Edges
Almost done! For this step you add depth and dimension by shading around all the black lines you just drew.
I use a Stabilo Pencil 8046 for this because it allows the pencil line to "move" around when you mix it with a water brush or watercolor marker.
This really helps to "sell" the piece by adding depth and shadows to what is really a two dimensional artwork. Make sure you pick a "light source". I always think of my light coming from the top left, meaning all the shadows are on the bottom right!
Step #9 - Grunge-ing Up The Last Layer
Because I am essentially a steampunk artist, I always grunge up my last layer with black. You could use white or a predominant color in your artwork if you wanted to instead!

For this I use a stencil, acrylic paint and a blending brush!
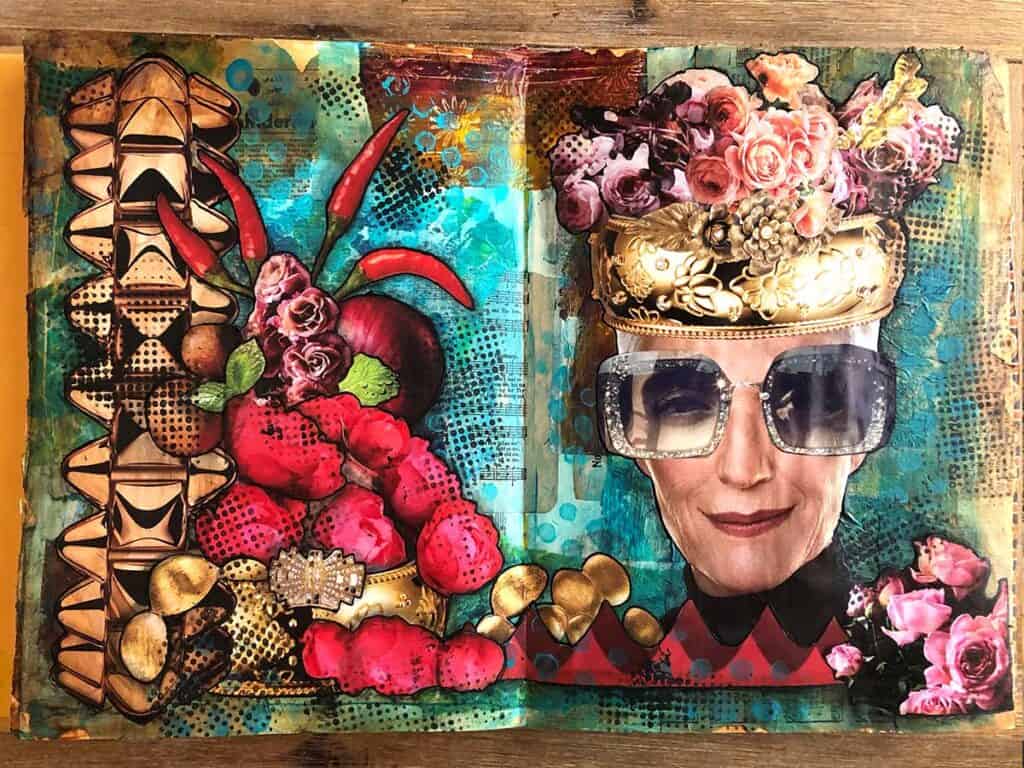
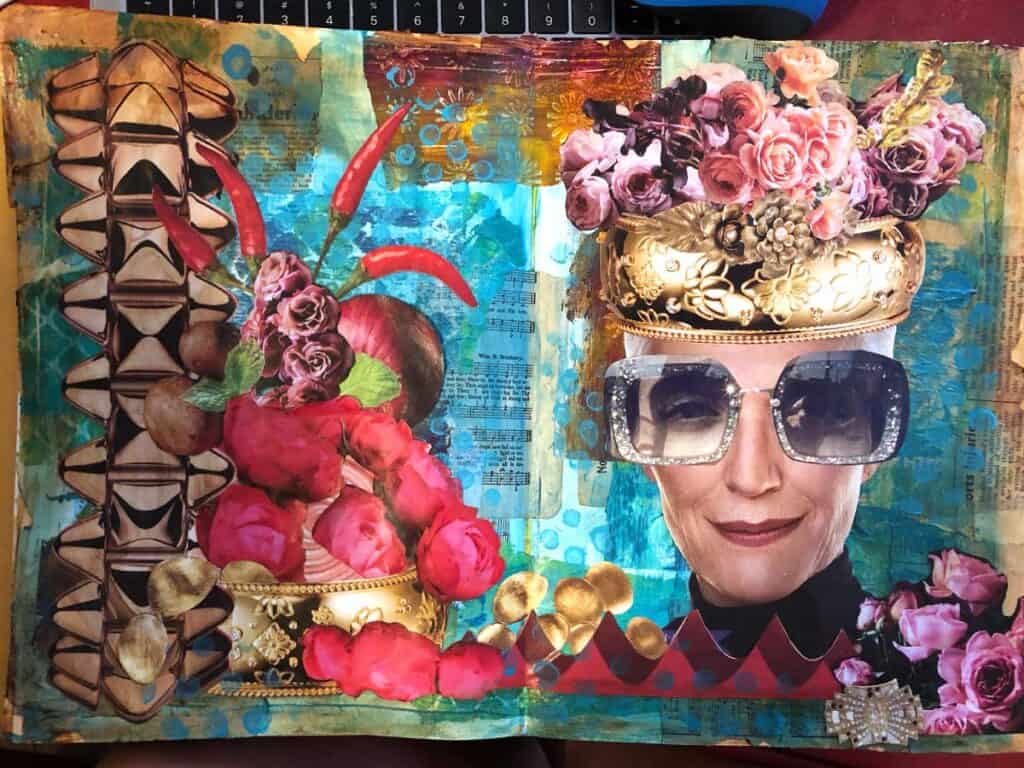
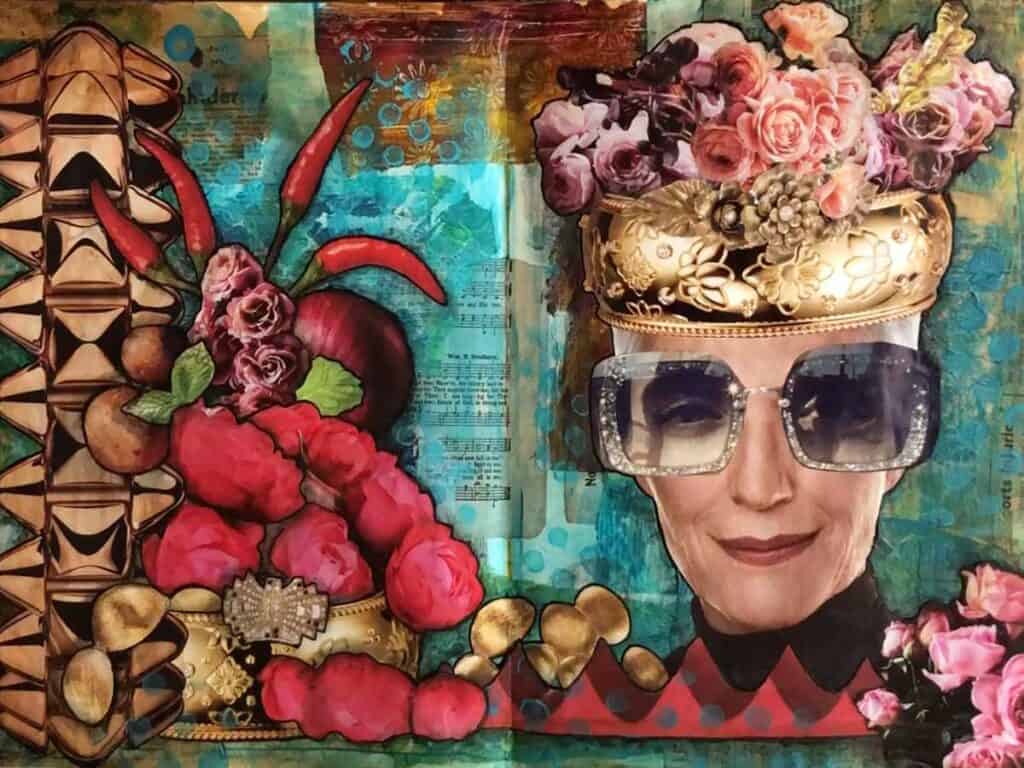
The Finished Steampunk Magazine Collage!
Alright, here she is finished up! I love how this one came out and it was super fun to talk with you along the way about what I was doing!