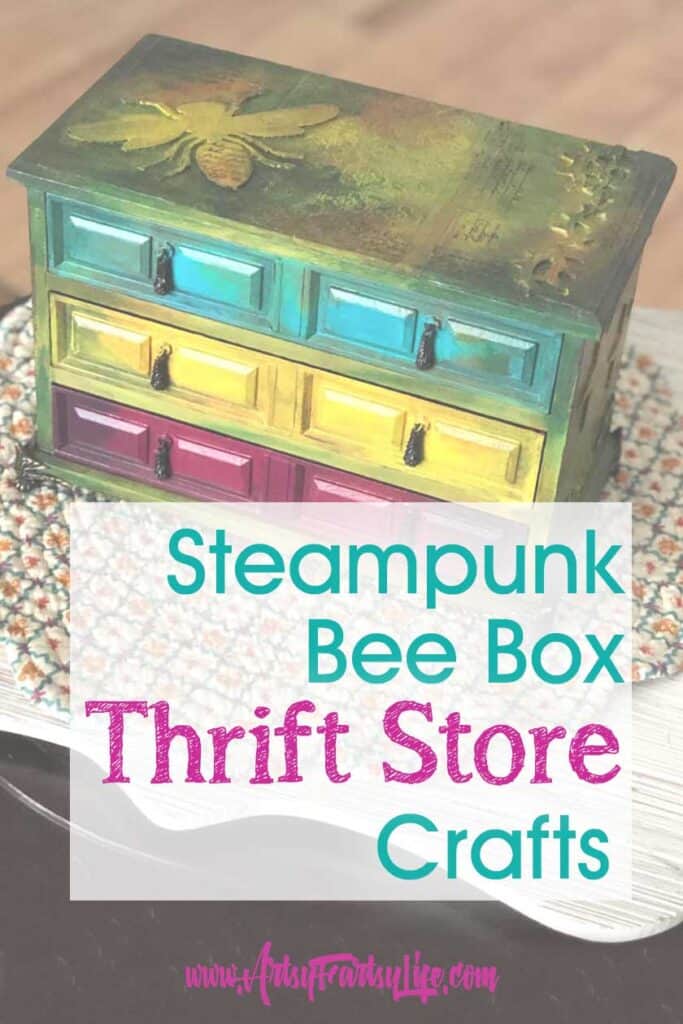
I love how this thrift store jewelry box came out! It is a steampunk theme with green, pink and turquoise. This DIY upcycling project was made with layers and layers of paint and varnish!
Please note: This article contains affiliate links, and that means that I may earn a commission if you buy something. Read my full disclosure here.
Bee Box Show And Tell
Thrift Store Jewelry Box
I love finding these kinds of old jewelry boxes at the thrift store! They are well made with solid wood and great construction.
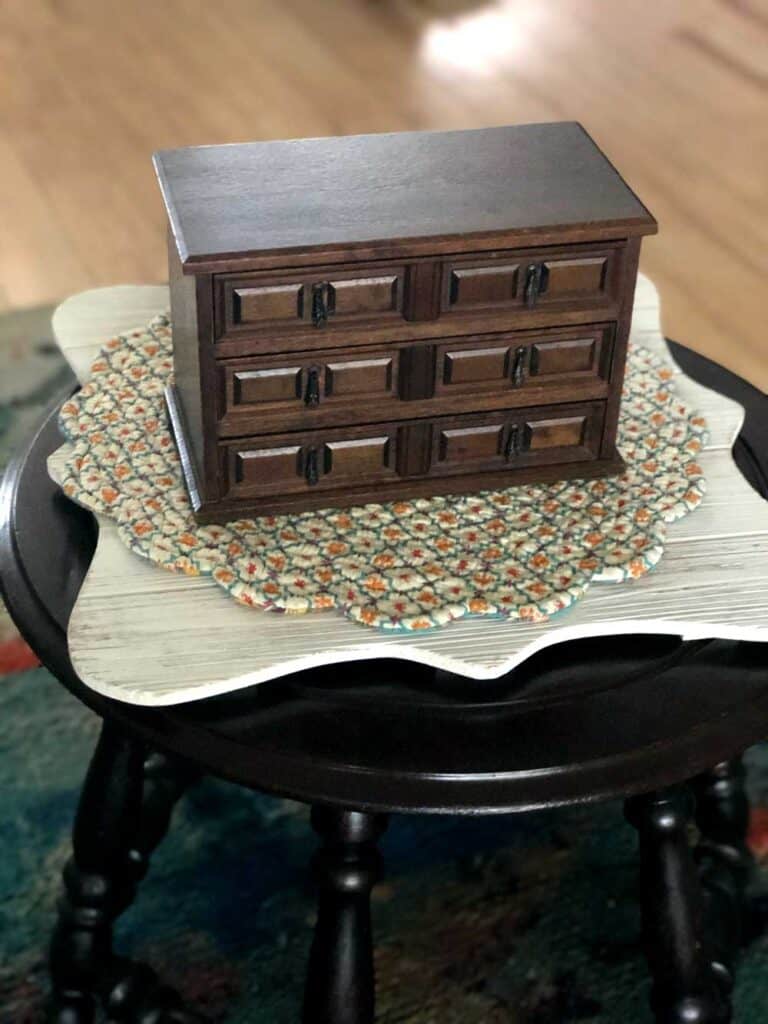
One thing I look for is no missing pieces and no woodworking needed. I am a fairly lazy crafter so I want to have fun with the decorating and not have to do any repairs before I get started!
Priming Your Project
You NEED to prime your project! If you don't prime it with something like chalk paint, "real" primer or gesso, all the other techniques you want to use will not work or will peel off after you are done!
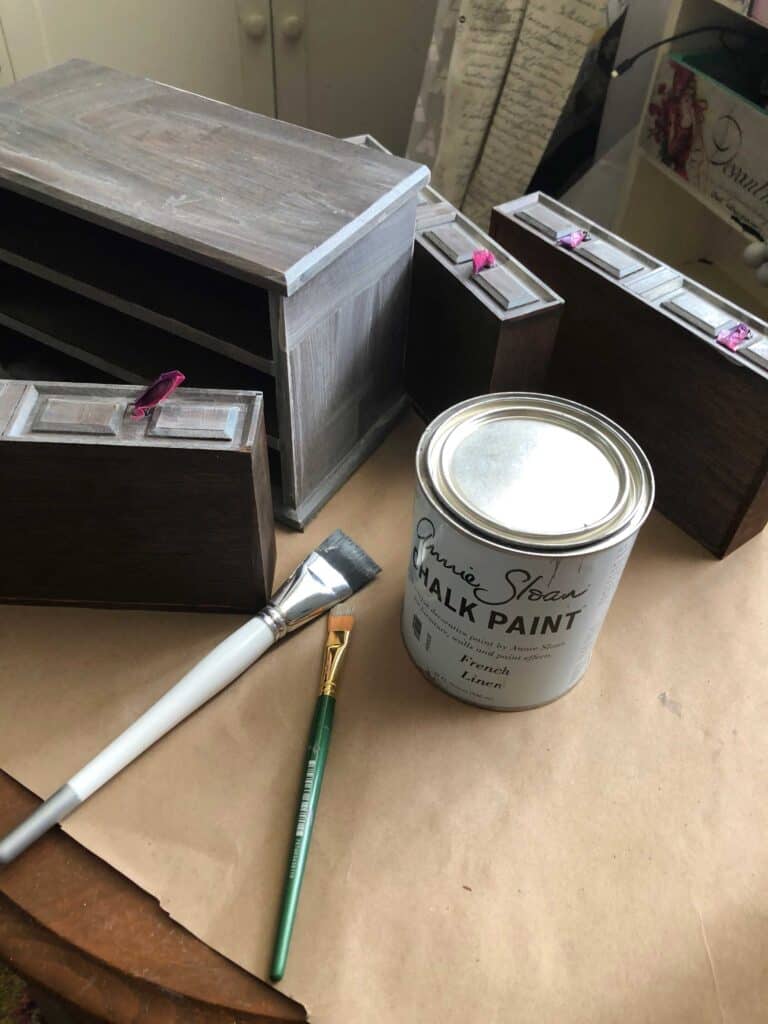
One thing that I have found is that using good paintbrushes to put on your primer will make a great base for your project! For this one I used a Dina Wakley wide paintbrush for the large areas I had to prime.
I used Annie Sloan chalk paint because I had it in my stash, you can use any kind of chalk paint you have.
Cool Background Texture (and a BIG Mistake!)
I knew I wanted to have a bunch of texture in the background. I had a bunch of "Architextures" from 7 Gypsies from my stash (I got a great deal when my local Michaels moved.... whoo whoo!)
I used those as the background layer and then used burlap paper to cut out the bee, gears and stars... this was super bad idea!
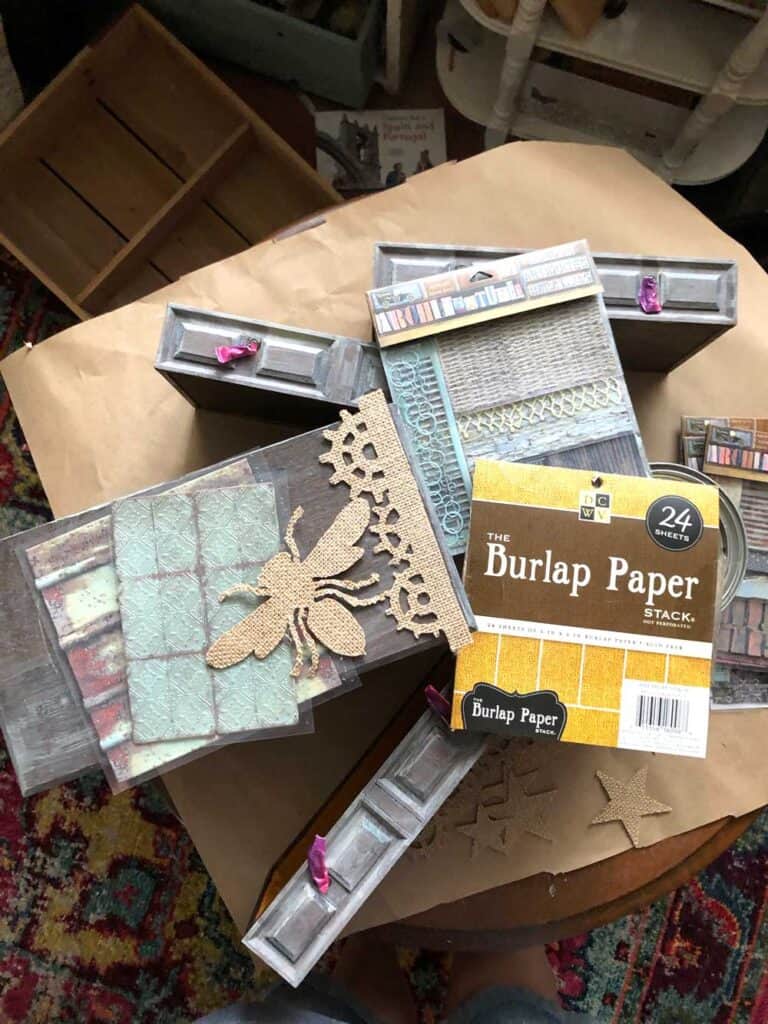
The burlap was SUPER delicate and kind of fell apart when it got wet. I spent SO MUCH TIME doing Mod Podge layers and glue and paint to try and make it work, but eventually I gave up and just scraped it off, which left a REALLY COOL texture layer there.
I was going to skip this step and act like I did great right from the beginning BUT I think it is important to tell people that there is NOTHING that can't be fixed.
Trying something that doesn't work doesn't mean your whole project is ruined, you just have to try something else.

If you LOVE making junk journals and want a full printable kit to help you get started, check out the Bee Junk Journal Kit

I had a old shipping box that had thin cardboard so I did the die cuts again and they worked great! To get through cardboard you need to use a heavy duty cutter like the Big Shot.

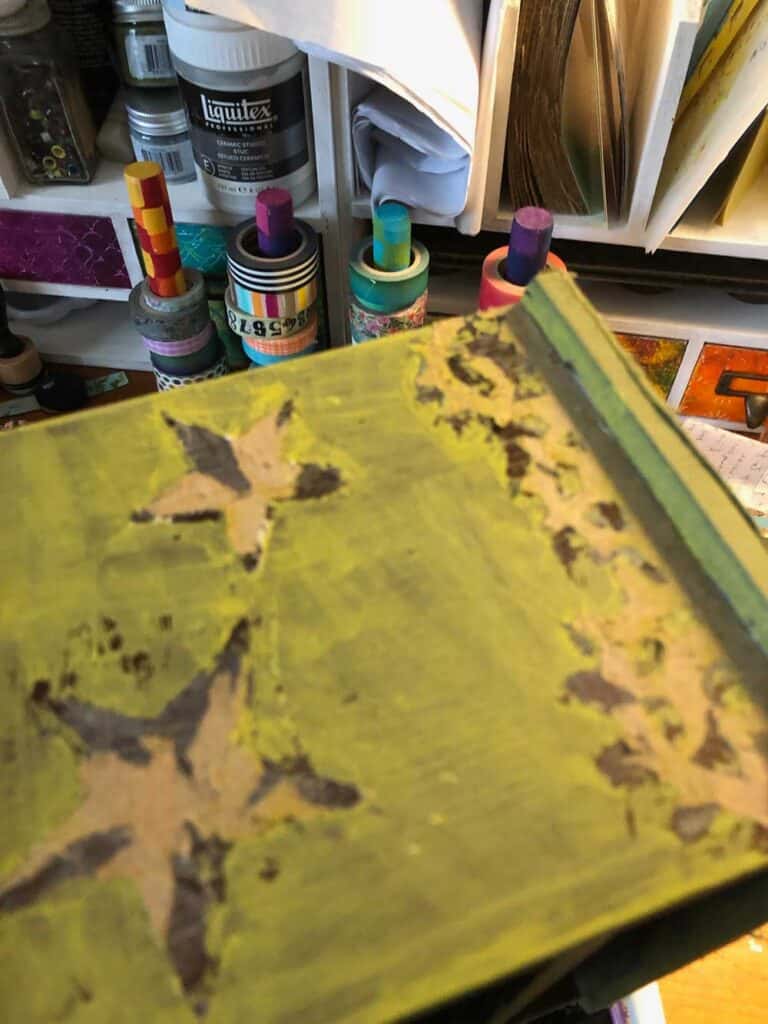
So Many Layers Of Paint
I knew that I wanted to use paint to make layers of depth of color. For this project I used so many colors of paint... greens, yellow, orange, brown... just so many!
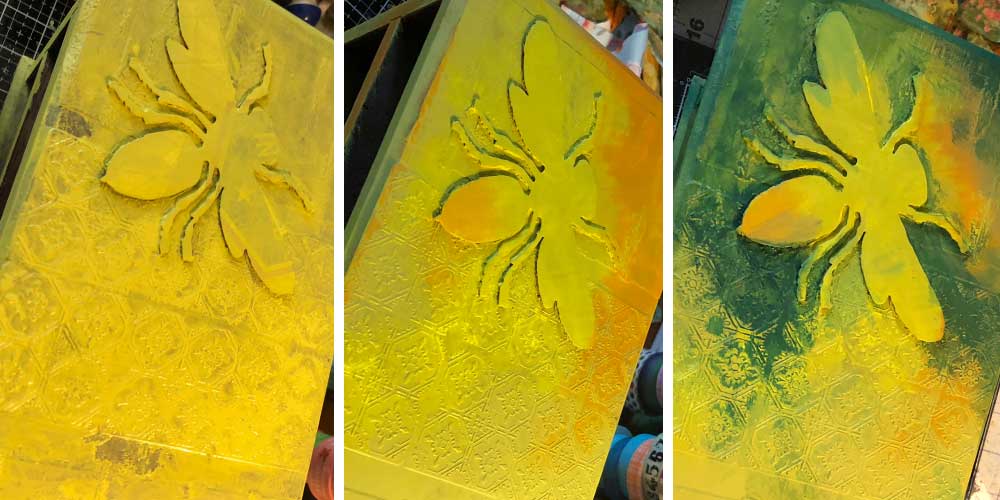
This is where having the background texture was super important! If it was just a blank background there would be no dimension and contrast with the light and dark paint colors!
Painting The Drawers
I knew that I wanted to add color to the drawers and not just have the one set of colors of the outside box.
I picked burgundy, turquoise and yellow. Again I used layer after layer of paint to add depth and "oldness" to the finish.
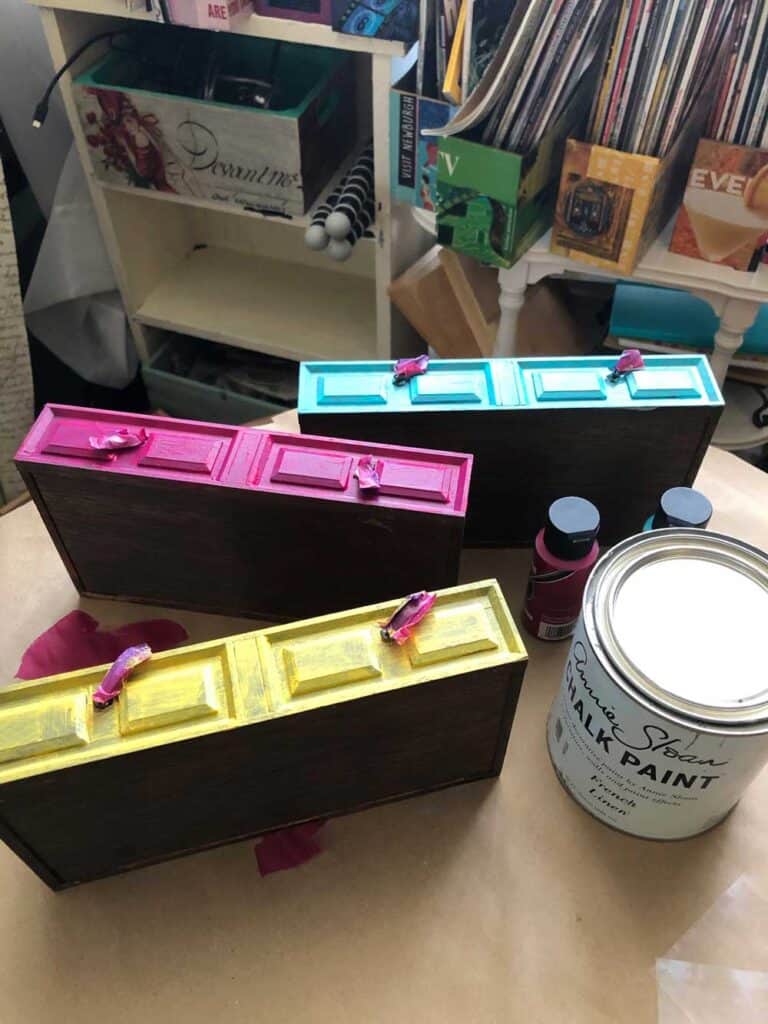
As you can see, when the paint first goes on it is bright and clean. I used layers of darker colors, brown and glaze to make the paint more transparent.
The Final Bee Box
I have to say that this turned out great! It looks pretty close to what I had in mind (with the dingy, dark steampunk look).
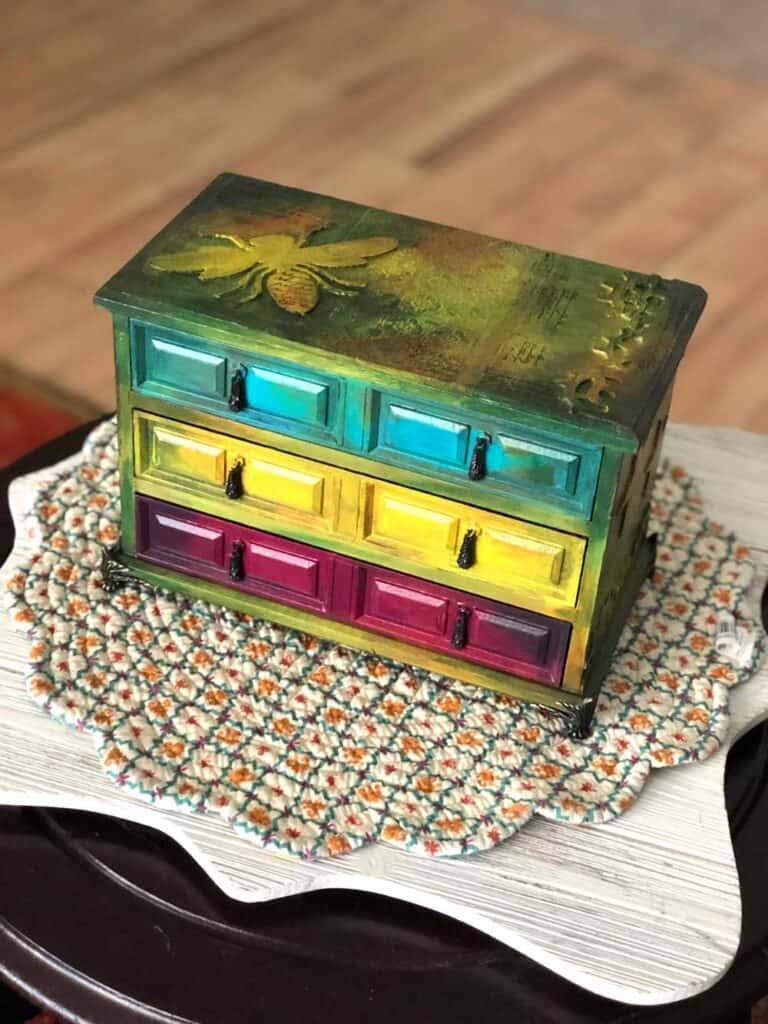
The final step was little finial feet. It looks old and dingy and cool, but it works great and I love how it turned out!
These kinds of box makeovers make me happy... saving something from being old and useless to making it beautiful and new again!