One of my favorite things to do is vintage crafts! Taking a ratty old storage box and making it a beautiful, functional way to increase storage in my craft room or office is so darn satisfying. This DIY project is super fast and easy to do! Here are my best tips and ideas for a successful project!
Finding Your Box or Tray
When you are searching in a thrift store, you might pass over a ratty tray like this one thinking that it is too damaged to be worthwhile.
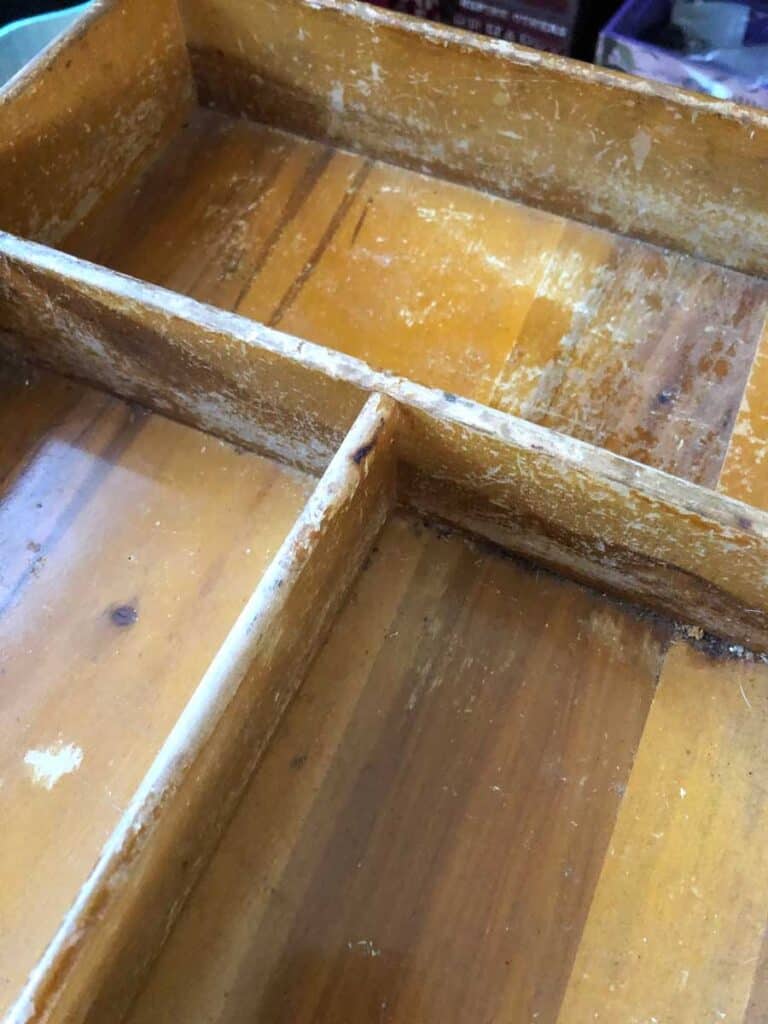
But look beyond some surface damage and see if the box is solid and made of wood.
It is amazing to me how solidly some of these old boxes were constructed. This one is SUPER heavy and a very solid piece that just need a little love to make beautiful!
Prime Your Box
If the finish of your box is loose, use a bit of sandpaper to get the loose bits off (I generally don't have to do this on the ones I have done so far).
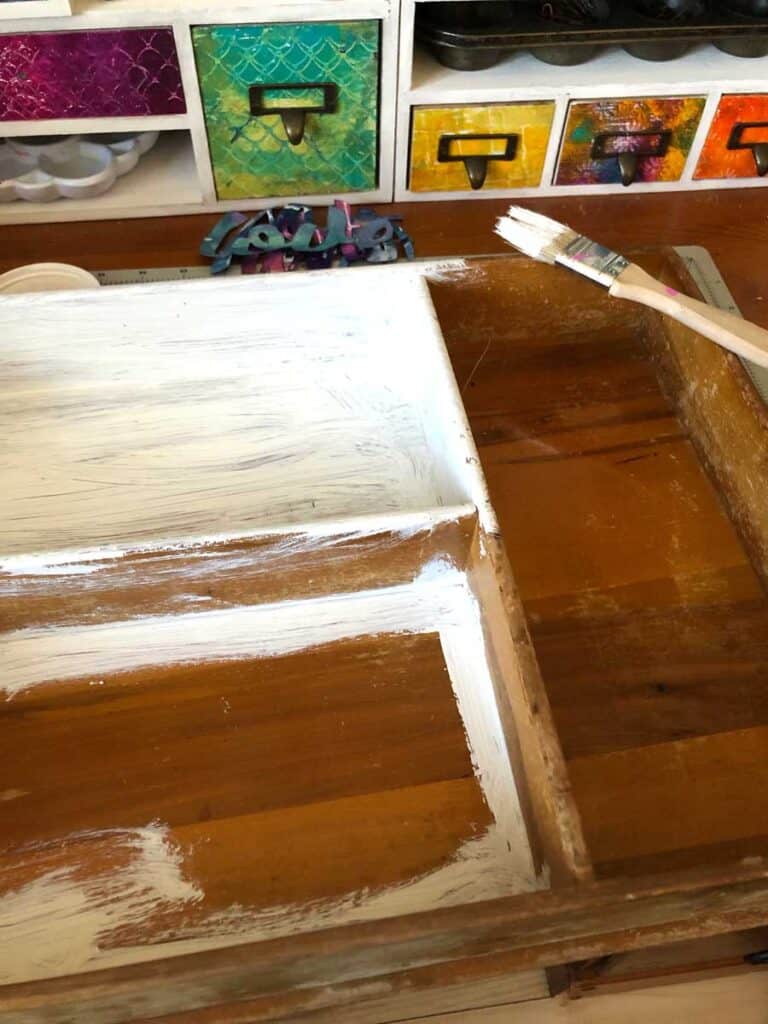
Then you want to prime your box. You can use a "real" primer if you have some left over from another DIY project or you can use Gesso like I do!
Gesso is used as a base coat for painting things like watercolors or oils to prepare a canvas. But I have found it sticks super well to old wood AND is a great base for your paint or decoupage to stick to!
White or Clear Gesso?
Gesso comes in both white or clear. I use the white for two reasons. First it is easier to see where I have painted when I am priming and second white makes a better base for the tissue paper. If you use clear gesso, the imperfections in the box might show up under the tissue paper and make your piece look icky..
Painting With Acrylic
Next comes the FUN part! You want to pick what colors of acrylic paint you want to use!
For this project I decided to use a fun piece of tissue paper I had for the outside so I wanted the inside to compliment those colors. I chose cream, red and turquoise.
You do not have to use expensive paint for this step, just know that you might have to put on a few coats if you are using cheap acrylics from Michaels or Hobby Lobby (like I do!)
Clean Up Any Messes
I used to take TONS of time to tape off the sides of my boxes to make sure that I had clean lines but then I found a super easy, effective way to make my lines clean afterward!
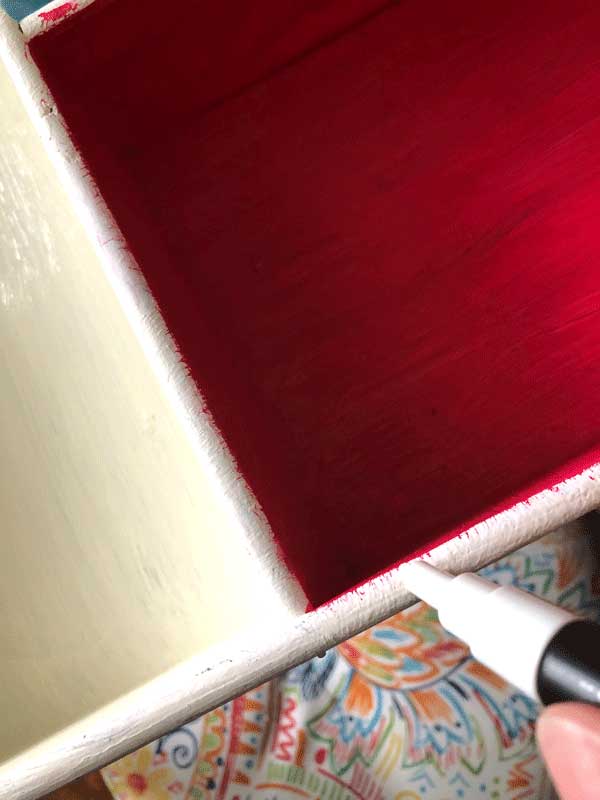
I simply use a Posco paint pen to make the crisp paint lines after the colorful insides are dry! Run your pen down the edge and make a crisp line, then color any areas that have lots of paint.
I would say that getting a good paint pen for this step is pretty important so you don't have to keep going over and over it again!
Decoupaging The Outside
I have a whole post about how to decoupage storage boxes, but here is a super simple version of it!
First paint on a medium layer of Mod Podge over the whole area you want to decoupage. On this box I decided I did not want the bottom lip to be decoupaged so I put some washi tape over it to keep the glue off the bottom part!
Cut your tissue paper larger than the space you are going to decoupage. I like to have a fairly large overhang so I can get a good grip when I am cleaning it up at the end. If you make it super close to the "right" size it will be hard to trim later.
I have had a couple of people of ask why I don't cut the tissue paper EXACTLY to the right size. Because this is a thrift store find, the dimensions might not be perfect and it is much harder to cut the paper first rather than after the whole project is done!
Then put your tissue paper on the side you are working on. Start in the center and GENTLY spread it out. You CAN reposition it for a wee bit.
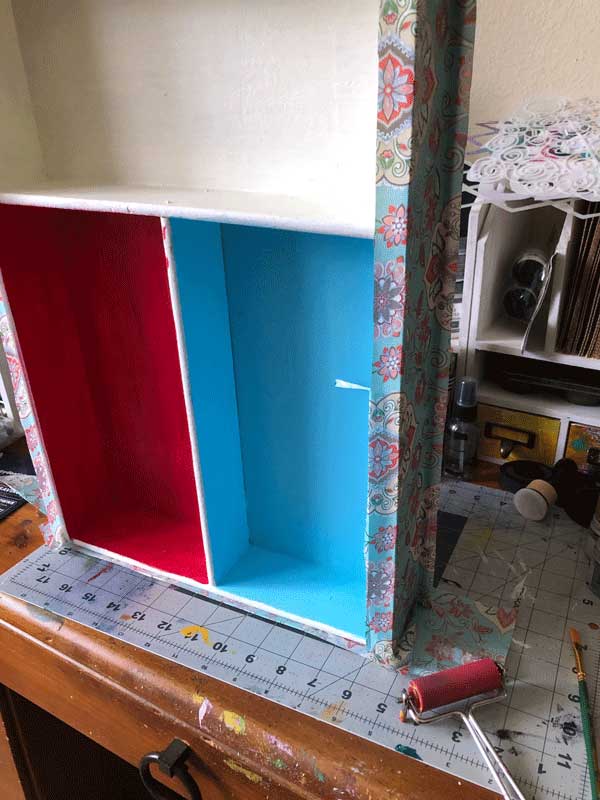
Use a brayer (like in the picture) to make sure the tissue paper is stuck down and squish any air bubble or wrinkly bits.
You can put a last layer of Mod Podge over the top to seal it if you like.
Last, but not least, you will want to take an Exacto knife and cut the excess tissue paper off. Hold it tightly away from the box and then run the knife right along the edge to get a clean cut!
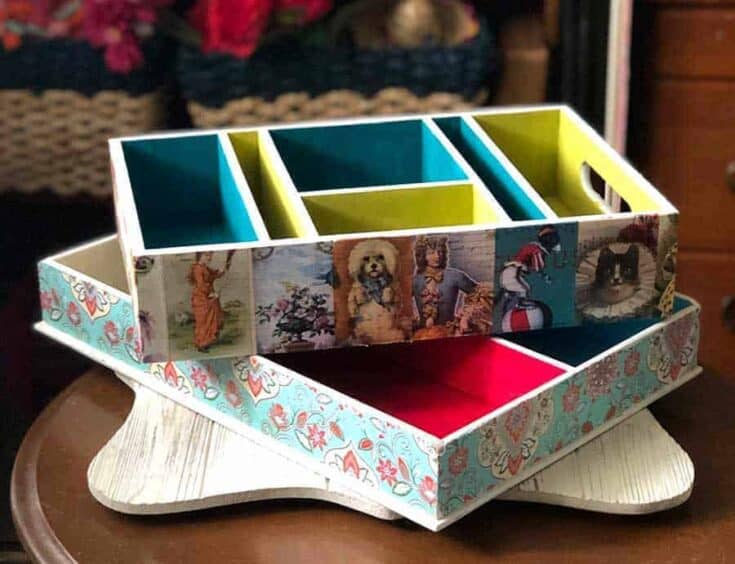
The Finished Decoupaged Painted Box
I LOVE how this box came out. It is super classy and the tissue paper I used matches the inside colors perfectly in real life!
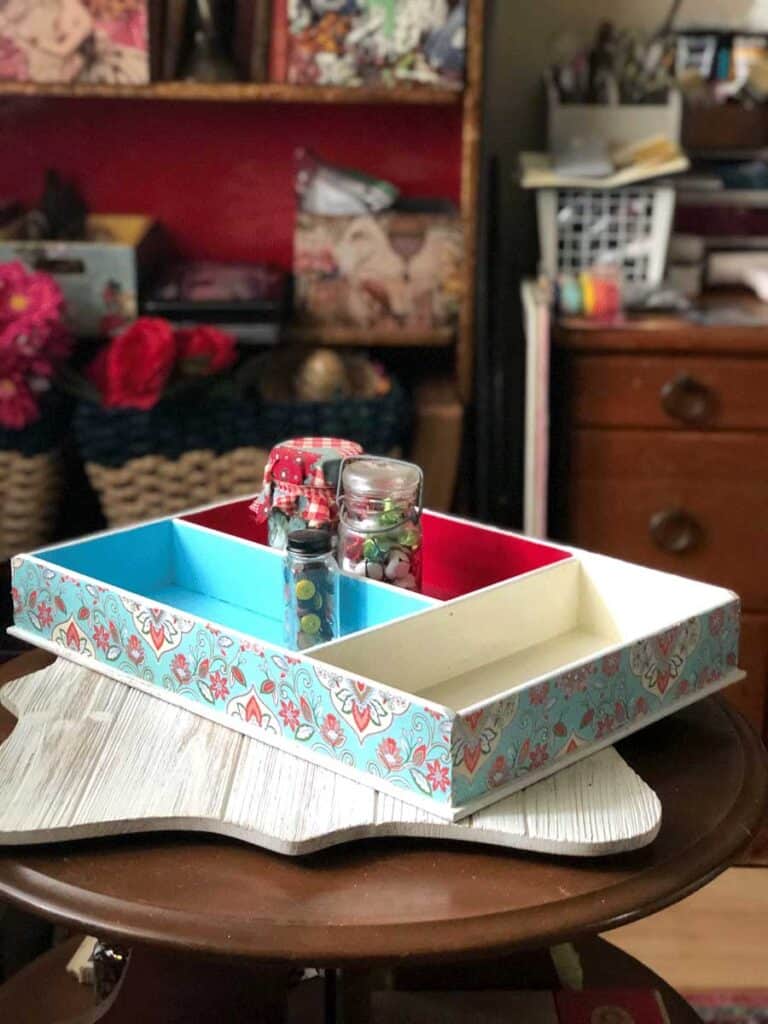
It always amazes me how I can take something that looks like it is ready for the trash heap and make it into a beautiful storage box for my craft room!
How To DIY Decorative Vintage Boxes
How to find a great vintage box to decorate. Tips and ideas for painting and decoupage a vintage box.
Materials
- Vintage Box
- Primer (Gesso)
- Acrylic Paint
- Tissue Paper
- Mod Podge
Tools
- Paintbrushes (for painting & decoupage)
- Brayer
Instructions
- Go to your local thrift store and find a vintage box. It doesn't need to be in good condition but it should be solidly made.
- Clean and dirt or oil off of the box.
- Prime the box (I use Gesso paint to prime my wood)
- Paint colorful areas with acrylic paint.
- Cut your tissue paper a little bit bigger than the area you are going to decoupage.
- Paint Mod Podge on areas that you are going to decoupage.
- Place tissue paper, making sure it is where you want it.
- Use brayer to firmly stick it to the box.
- After tissue paper has dried, put last sealing coat of Mod Podge on tissue paper.
- Use an Exacto knife to cut the excess tissue paper off.
Recommended Products
As an Amazon Associate and member of other affiliate programs, I earn from qualifying purchases.
-
 Tonic Studios Tim Holtz 371 Retractable Craft Knife
 -
 uni POSCA White = 3 Different Point Sizes per Pack: PC-1M(0.7 mm), 3M(0.9~1.3 mm), 5M(1.8~2.5 mm)
 -
 Liquitex 5332 Acrylic Paint, Multicolor
 -
 Apple Barrel PROMOABI, Assorted Colors 1 (18 pack)
 -
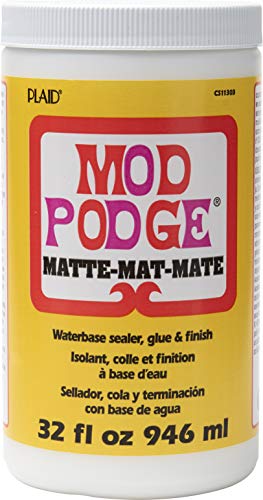 Mod Podge CS11303 Waterbase Sealer, Glue & Decoupage Finish, 32 oz, Matte
 -
 Ranger Inky Roller Brayer, Small 2-¼-Inch